2026 Granny Pod Costs: Understanding Zoning Regulations
Quick Overview
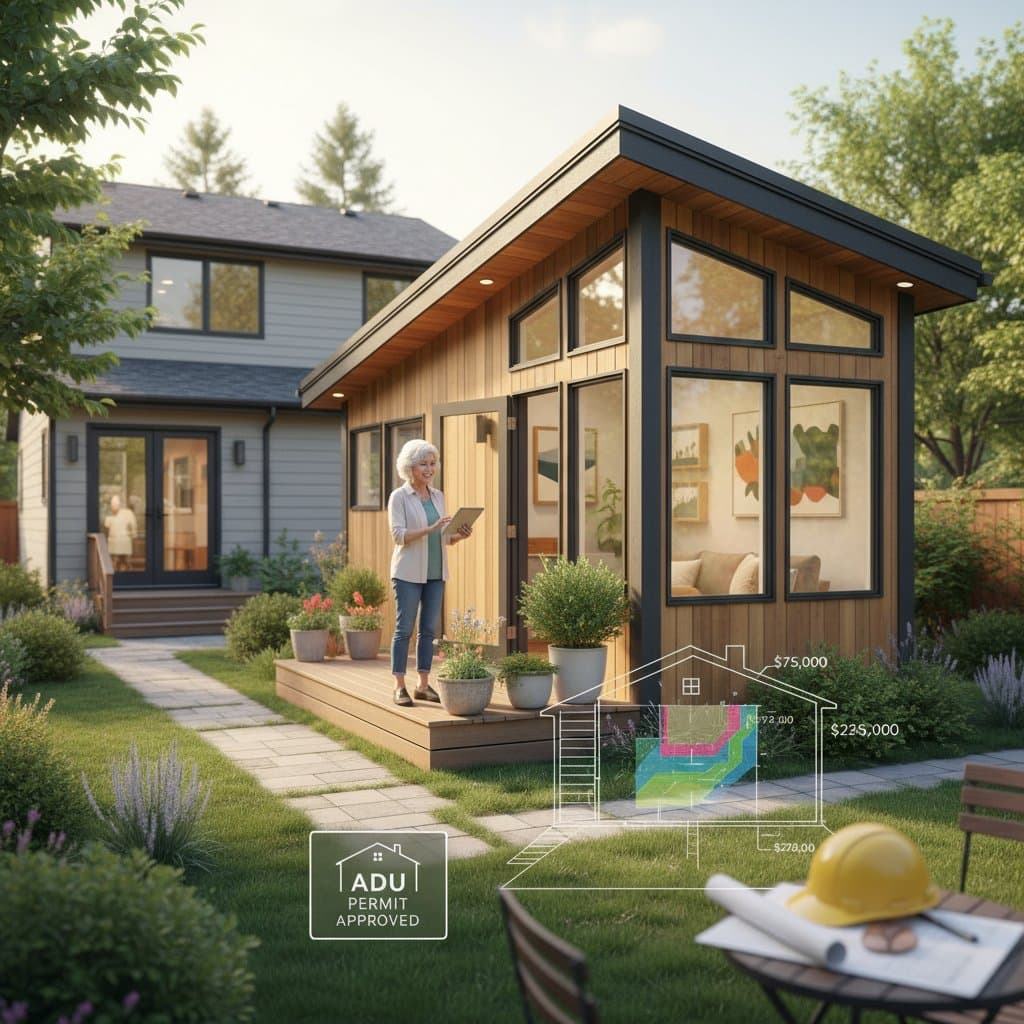
- Budget for $75,000 to $250,000 on a complete granny pod installation, influenced by dimensions, interior finishes, and connections to utilities.
- Zoning regulations determine placement options and integration methods with the primary residence.
- Assemble small prefabricated units yourself, though comprehensive plumbing or electrical integrations demand a certified professional.
Advantages and Disadvantages
Advantages
- Maintains family proximity while preserving individual privacy.
- Increases property value upon resale if constructed in accordance with accessory dwelling unit standards.
- Lowers long-term expenses compared to assisted living facilities.
- Allows adaptable usage for visitors or caregivers in the future.
Disadvantages
- Involves substantial initial expenses for building and approvals.
- Certain communities prohibit or limit accessory dwelling units.
- Potentially elevates property taxes and insurance premiums.
- Necessitates designs that accommodate mobility and enhance safety.
Step-by-Step Guide: Planning and Constructing a Granny Pod
Required Tools and Materials
- Tape measure along with a site diagram
- Level and stakes to outline the foundation
- Shovel or auger to evaluate soil conditions
- Personal protective equipment including gloves, eye protection, and sturdy boots
- Essential carpentry implements for prefab kit assembly
Timeline: Four to eight months for complete setup
Complexity: Moderate to advanced, varying by terrain and utility integrations
1. Review Local Zoning Regulations
Contact the municipal or county planning department first. Inquire about accessory dwelling unit or secondary residence policies. Verify requirements for minimum parcel dimensions, unit dimensions, boundary offsets, and utility linkages. Also examine restrictions on height and parking provisions.
Practical Advice: Certain jurisdictions mandate that the primary residence stays owner-occupied. Secure this confirmation in documented form prior to committing resources.
2. Evaluate the Site
Designate possible positions. Maintain a minimum of 10 feet from boundaries and 6 feet from existing buildings, unless local codes permit reduced distances. Assess incline, water runoff, and root systems. Arrange a professional soil analysis for projects involving concrete bases.
3. Select a Design
Choose among prefabricated, modular, or custom-built options.
- Prefabricated: Enables rapid assembly, requires fewer approvals, and typically occupies a compact area.
- Modular: Constructed in factory sections and combined onsite, which simplifies adherence to building codes.
- Custom-Built: Offers extensive customization possibilities but extends the project duration.
Align the floor plan with accessibility requirements. Prioritize broad entryways, barrier-free access points, and bathrooms suited for limited mobility.
4. Obtain Necessary Permits
Secure approvals for construction, electrical systems, plumbing, and occasionally septic installations. Engage a qualified plumber for sewer or water main attachments. Some locales insist on an engineer's certification for foundation plans.
5. Prepare the Foundation Area
Remove debris and ensure even ground. Stabilize the earth and lay a concrete pad or install support piers. Establish utility lines prior to positioning the structure. Locate and flag all subsurface conduits before excavation.
6. Construct or Assemble the Unit
Manufacturers typically transport and position prefabricated or modular units using cranes. For custom builds, contractors erect frameworks, apply exterior coverings, and complete internal elements. Arrange inspections for each construction phase as mandated locally.
7. Integrate Utilities
Lay pipes for water, sewage, and electricity. Incorporate a dedicated circuit breaker if stipulated. For septic systems, validate sufficient capacity prior to linkage.
8. Conduct Inspections and Finalize
Arrange evaluations for every specialized area. Incorporate accessibility aids such as ramps, handrails, and illumination. Verify functionality of all installations before habitation begins.
9. Outfit and Occupy
Select space-efficient furnishings, support handles, and slip-resistant surfaces. Ensure unobstructed routes throughout the interior.
Do-It-Yourself Versus Professional Assistance
Suitable for Do-It-Yourself Efforts
- Site clearing and earth leveling
- Basic assembly of compact prefabricated exteriors
- Addition of insulation or decorative trim
- Painting along with simple interior modifications
Instances Requiring Professional Expertise
- Fresh electrical or plumbing installations
- Connections to public sewage or gas infrastructure
- Foundations needing structural analysis
- Jurisdictions requiring certified plans or oversight
Distinct Professional Contributions
A certified constructor oversees approvals, verifications, and regulatory conformity. They guarantee appropriate structural support and secure utility attachments. Qualified specialists also safeguard warranties and insurance protections.
Alternative Options
Garage Adaptation
Optimal for structures already present with proximate utilities. More economical, yet it might compromise seclusion or ease of access.
Basement Suite
Suitable for homes featuring walk-out or illuminated lower levels. Reduces costs but could seem restrictive and demand improved air circulation.
Standalone Tiny Residence
Perfect for versatile applications past elder support. Generally limited to under 400 square feet, facilitating relocation or alternative uses.
Project Initiation Checklist
- Confirm zoning guidelines and offset distances through the local planning authority.
- Measure the outdoor space and indicate feasible sites.
- Evaluate prefabricated, modular, and custom construction alternatives.
- Solicit detailed estimates including permit projections.
- Engage a constructor experienced in accessory dwelling unit requirements.
- Integrate accessibility elements from the outset.
- Coordinate verifications and retain records of all authorizations.
- Establish a routine maintenance schedule post-installation.
Realizing Your Backyard Dwelling
A granny pod represents a prudent financial decision and a caring solution. It fosters family connections without sacrificing personal space. Success hinges on thorough groundwork, beginning with regulatory inquiries ahead of any design or acquisition. Develop a comprehensive budget encompassing approvals, connections, and completion expenses.
When the property meets criteria and resources align, this addition holds enduring utility. Initially for a parent, subsequently for a young adult, and later for visitors or renters. Through meticulous strategy, robust building practices, and consistent care, the structure endures alongside family needs.


