2026 Granny Flat Costs: Full Budget Breakdown
Quick Overview
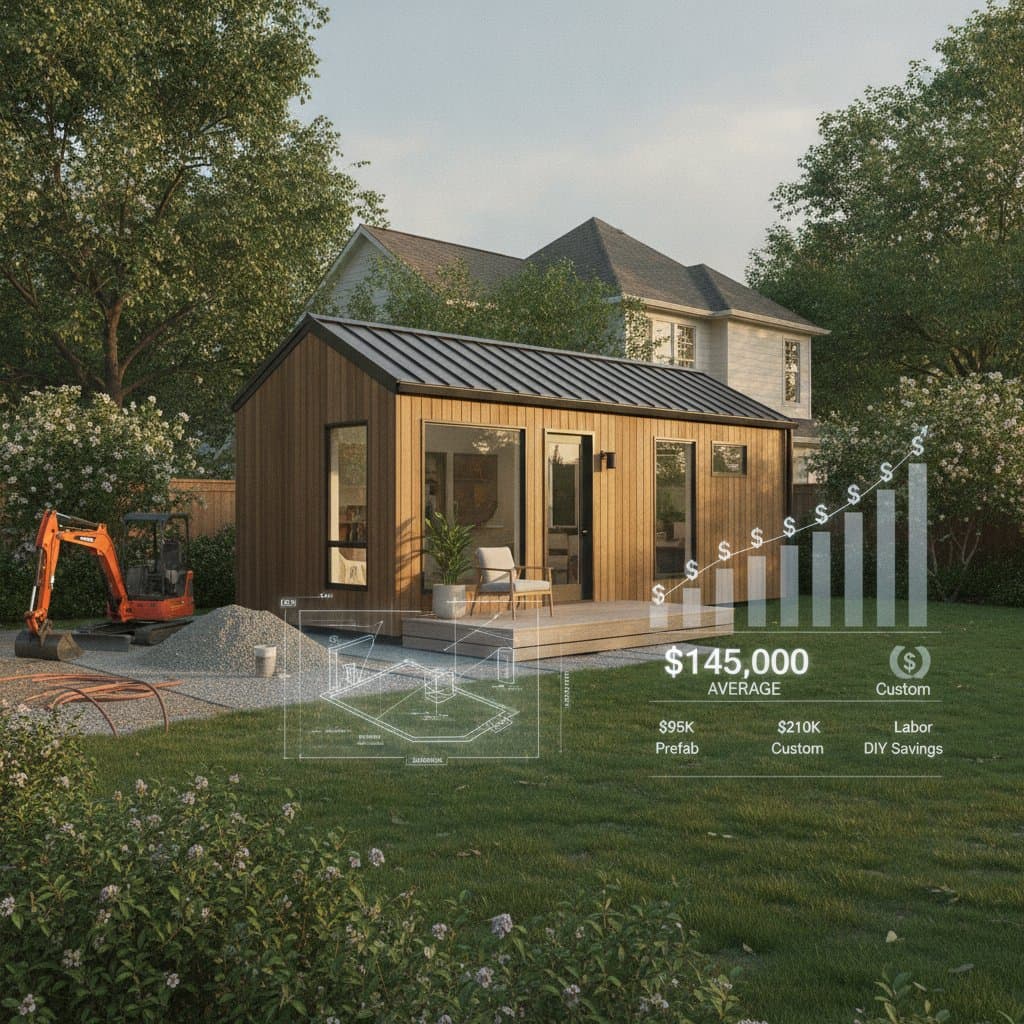
A granny flat, known also as an accessory dwelling unit or ADU, typically costs between $100,000 and $300,000 for a complete construction project. Prefabricated units offer a more affordable entry point, beginning around $80,000. Custom constructions featuring premium finishes may exceed $350,000. Additional expenses for permits, site preparation, and utility connections frequently account for 20 to 30 percent of the overall budget.
Defining a Granny Flat
A granny flat represents a compact, independent residence constructed on the same property as the primary home. It incorporates its own kitchen, bathroom, and sleeping quarters. Property owners utilize these units for accommodating extended family, hosting guests, or generating rental revenue. Configurations include attached extensions to the main structure or standalone buildings in the rear yard.
Advantages and Disadvantages
Advantages
- Expands available living area without the need to acquire additional property.
- Generates potential rental income to offset construction expenses.
- Increases the overall property value through enhanced functionality.
- Offers separate living arrangements that promote privacy for residents.
Disadvantages
- Requires a substantial initial financial investment.
- Reduces remaining outdoor space following installation.
- Potentially incurs higher property taxes due to the added structure.
- Encounters delays from utility setups and permitting processes that extend the project timeline.
Ideal Scenarios and Potential Pitfalls
Ideal Scenarios
- Properties with ample unused yard area available for development.
- Locations where zoning regulations permit secondary dwelling units.
- Situations demanding long-term adaptability for family needs or tenant occupancy.
Potential Pitfalls
- Sites without sufficient access for heavy construction machinery.
- Properties where utility lines lie far away, escalating connection costs.
- Areas with strict local codes that restrict unit size or building height.
Step-by-Step Guide: Planning and Constructing a Granny Flat
Essential Tools and Materials
- Measuring tape, stakes, level, shovel, concrete mix, framing lumber, insulation, drywall, roofing materials, electrical wire, plumbing pipes, and fixtures.
- Safety equipment including gloves, goggles, and steel-toed boots.
Estimated Timeline: 3 to 9 months.
Project Difficulty: Moderate to high, influenced by design complexity and permitting requirements.
1. Verify Zoning and Secure Permits
Contact the local planning department to determine if your property qualifies for an ADU. Inquire about specific setbacks, maximum heights, parking mandates, and utility standards. Obtain a detailed written list of all necessary permits to guide your preparations.
2. Establish a Practical Budget
Account for expenses related to design, permits, impact fees, site preparation, materials, and labor. Incorporate a minimum 10 percent buffer for unforeseen expenditures. Evaluate prefabricated versus custom alternatives to align with your financial and functional objectives.
3. Select an Appropriate Design
Consider options such as attached additions, detached structures, or garage conversions. Detached units provide greater privacy yet demand higher utility extension costs. Attached designs often share walls, thereby minimizing framing and roofing outlays.
4. Engage a Designer or Architect
Qualified professionals develop code-compliant plans that maximize efficient use of space. Design services generally cost 5 to 10 percent of the total project budget. Request comprehensive construction drawings suitable for immediate permit submission.
5. Solicit Bids and Select a Contractor
Gather at least three proposals from licensed contractors. Assess each bid for scope of work, material specifications, and warranty provisions. Verify references and insurance coverage. Finalize a contract that outlines payment schedules linked to specific project milestones.
6. Prepare the Construction Site
Remove obstacles, grade the terrain evenly, and identify underground utility locations. Engage excavation specialists if foundation work demands it. Consider how soil composition and land slope might necessitate additional grading or retaining walls, which could elevate expenses.
7. Construct the Foundation
Select from slab-on-grade, pier-and-beam, or crawl space foundations. Slab foundations prove the most economical but complicate future plumbing modifications. Crawl spaces facilitate superior access for ongoing maintenance. Proceed to framing only after the foundation clears inspection.
8. Erect Framing and Install Roofing
Employ treated lumber or steel for framing. Apply sheathing and position roof trusses, followed by shingles or metal coverings. Confirm wall squareness prior to advancement. Sound framing supports subsequent drywall installation and finishing tasks.
9. Install Rough Utilities
Route plumbing, electrical, and HVAC systems before adding insulation. Arrange inspections after each phase completes. Mandate licensed specialists for these installations, as adherence to codes ensures safety and insurability.
10. Apply Insulation, Drywall, and Finishes
Choose insulation materials suited to your regional climate. Secure drywall panels, apply tape and compound, then paint surfaces. Incorporate flooring, cabinetry, and fixtures using resilient options that minimize future upkeep demands.
11. Conduct Inspections and Final Connections
Arrange comprehensive inspections covering structural integrity, electrical systems, and plumbing. Activate utility services and verify functionality of all outlets and appliances. Secure a certificate of occupancy prior to habitation or leasing.
12. Complete Landscaping and Site Restoration
Address any damage to lawns or fences incurred during construction. Install privacy features or access paths as needed. Handle debris removal via authorized waste management or recycling services.
Detailed Cost Analysis
Standard Price Range: $100,000 to $300,000.
Elements That Increase Expenses
- Bespoke finishes or intricate roof designs.
- Challenging terrains like steep slopes or confined lots requiring extensive grading or walls.
- Extended utility lines or necessary upgrades to primary service panels.
- Elevated labor costs prevalent in metropolitan regions.
Elements That Decrease Expenses
- Prefabricated or modular construction methods.
- Straightforward rectangular layouts.
- Shared utility infrastructure with the existing home.
- Owner-provided finishing materials or selective DIY contributions.
Rebuilding Versus Partial Repairs
For aging detached buildings needing comprehensive plumbing, wiring, or foundation overhauls, a complete reconstruction often yields lower costs per square foot compared to incremental fixes.
DIY Versus Professional Assistance
Suitable for DIY Efforts
- Initial site clearing and final landscaping.
- Interior painting, flooring installation, and trim finishing.
- Cabinet and fixture placement with proper instructional support.
Require Professional Expertise
- Foundation pouring, structural framing, and roofing assembly.
- Electrical wiring, plumbing installations, and HVAC setups.
- All activities subject to mandatory inspections or permitting.
Rationale for Professional Involvement
Experts possess in-depth knowledge of building codes and structural engineering principles. Licensed contractors manage liability risks and provide warranties. Errors in critical areas like utilities or framing can invalidate insurance policies and diminish property marketability.
Ongoing Maintenance Strategies
Recommended Frequency: Biannual inspections.
Key Maintenance Activities
- Examine roof, gutters, and exterior siding for signs of moisture intrusion.
- Verify operation of smoke and carbon monoxide detectors.
- Clear and flush drainage systems to prevent backups.
- Renew caulking seals around windows and entry points.
Benefits of Routine Care
Consistent maintenance sustains low utility consumption and prevents expensive issues such as water infiltration or infestations.
Viable Alternatives to New Construction
Garage Conversion Projects
Ideal for constrained budgets, these leverage pre-existing frameworks. Design options remain limited, and available parking may decrease.
Basement Apartment Developments
Suitable for regions with harsh winters, these share foundational and utility elements. Challenges include reduced daylight exposure and diminished privacy.
Prefabricated ADU Solutions
These enable swift assembly and budget predictability. Customization possibilities narrow, though timelines shorten considerably.
Frequently Asked Questions
What is the maximum allowable size for a granny flat?
Local regulations typically permit 400 to 1,000 square feet. Consult planning authorities early to avoid redesign expenses.
Are separate utility meters required?
Certain municipalities mandate independent metering for rental properties, while others permit shared systems. Verify requirements with your local utility company.
How does construction affect property taxes?
The addition elevates the assessed property value, leading to increased taxes. Contact your county assessor for precise valuation methods.
Is immediate rental possible upon completion?
Occupancy awaits final inspections and approvals. Some jurisdictions stipulate that the owner reside on the premises for short-term rentals.
Do prefabricated units appreciate in value?
Code-compliant, fixed installations enhance resale potential. Mobile or temporary setups contribute less to property equity.
Does the unit require a distinct address?
Select cities issue sub-addresses for emergency and postal services. The building department clarifies this during the permitting phase.
Is solar panel integration feasible?
Rooftop or ground-based systems reduce energy demands effectively. Review guidelines on metering arrangements and installation capacities.
Essential Checklist for Budgeting and Construction
- Validate zoning permissions and ADU eligibility.
- Define budget parameters with contingency allocations.
- Determine design category: attached, detached, or conversion.
- Commission code-adherent professional blueprints.
- Acquire comprehensive permits.
- Collect and vet contractor proposals.
- Ready site and utility preparations.
- Execute foundation, framing, and roofing phases.
- Integrate plumbing, electrical, and HVAC rough-ins.
- Complete interior finishes and fixture installations.
- Achieve inspection clearances and utility activations.
- Perform landscaping and debris management.
- Initiate biannual maintenance routines.
Realizing Your Granny Flat Vision
Constructing a granny flat demands meticulous planning, steadfast patience, and informed choices. Initiate the process by mastering local zoning constraints and financial boundaries. Rely on specialists for aspects involving safety and regulatory compliance. Document progress through detailed estimates and formal agreements.
Effective site management and permit navigation streamline execution. Upon completion, the granny flat delivers versatile utility as guest quarters, income property, or family extension. Diligent upkeep safeguards this asset, ensuring enduring comfort and reliability.