Understanding Greywater Systems and Their Savings Potential
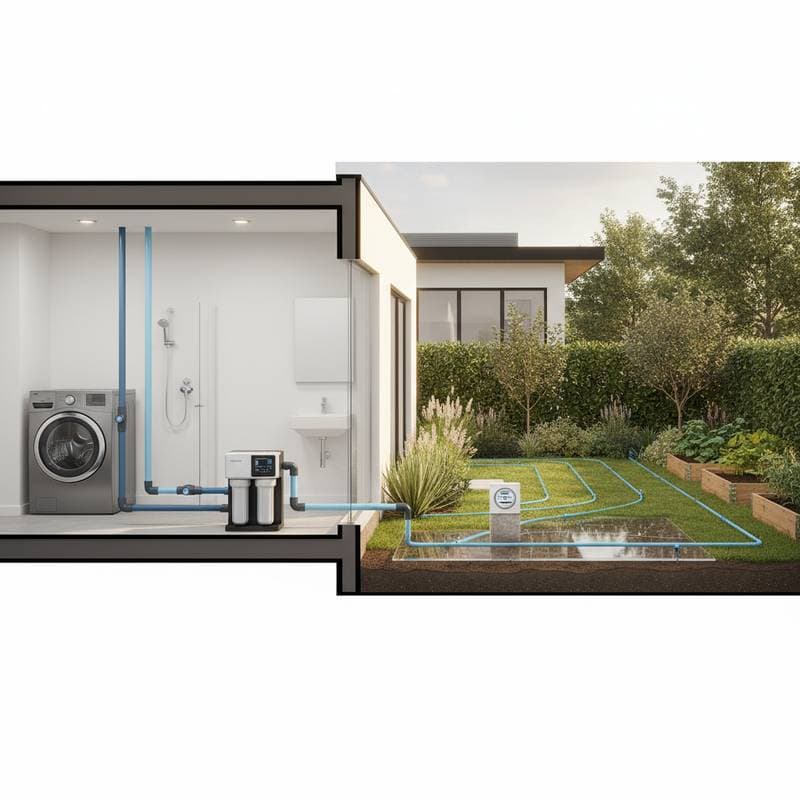
Greywater refers to wastewater from sinks, showers, bathtubs, and washing machines, excluding toilet water. These systems collect and redirect such water for non-potable uses, such as garden irrigation or toilet flushing. By implementing a greywater system, households can decrease overall water usage significantly, often achieving reductions of 25 to 40 percent in outdoor watering demands.
The financial appeal lies in lowered utility bills, particularly in arid regions where water costs rise steadily. Beyond economics, these setups alleviate pressure on municipal sewers or septic systems, promoting environmental stewardship. Proper design ensures safety, preventing health risks from contaminants.
Key Benefits and Drawbacks
Greywater systems offer multiple advantages for homeowners committed to conservation.
Advantages
- Reuse up to 50 percent of household wastewater, directly lowering water bills.
- Ease the burden on septic tanks or sewer infrastructure, potentially extending their operational life.
- Foster drought-tolerant landscapes by providing consistent moisture to plants.
- Access potential rebates or incentives from local utilities for sustainable upgrades.
- Enhance rural property efficiency by preserving drain field integrity.
However, challenges exist that require careful consideration.
Drawbacks
- Upfront costs for materials and labor can strain budgets.
- Ongoing needs include filter cleaning, pump servicing, and system monitoring.
- Existing home plumbing may complicate installation routes.
- Regional regulations might limit indoor applications or mandate rigorous inspections.
- Improper setup risks odors, clogs, or microbial proliferation if maintenance lapses.
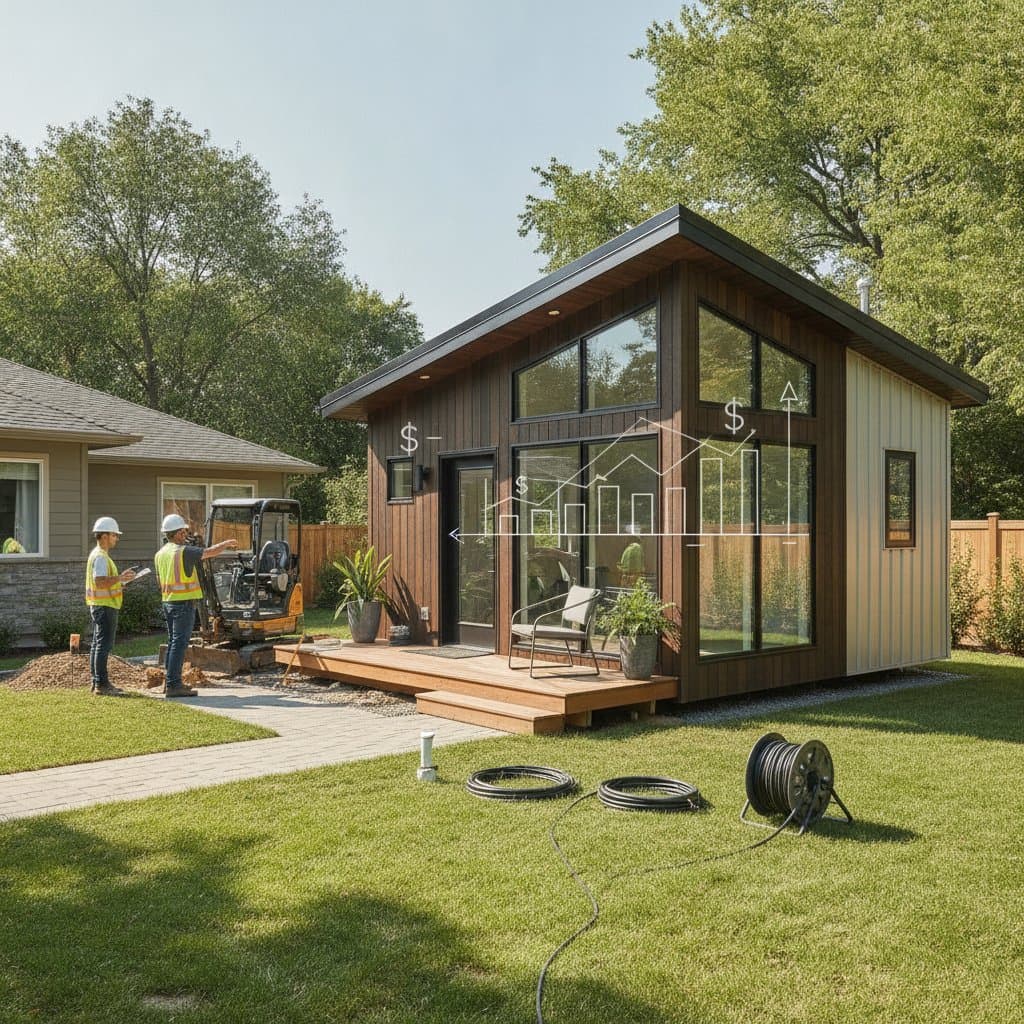
Installation Costs and Permit Essentials for 2026
In 2026, expect installed greywater systems to cost between $2,000 and $8,000, influenced by factors like system scale, site accessibility, and local permitting fees. Basic laundry diversion setups fall at the lower end, while comprehensive whole-house integrations approach the higher range. Permits, typically $100 to $500, verify compliance with health and building codes.
Filtration and treatment components add to expenses but ensure water quality for safe reuse. Eco-savings materialize through bill reductions of 25 to 40 percent on irrigation, often recouping costs within 3 to 7 years. Consult local authorities early to identify rebates that offset initial outlays.
Step-by-Step Guide to Installing a Greywater System
Successful installation demands precise planning to align with home layout and regulations. Focus on gravity-fed designs where possible to minimize energy use.
Required Tools and Materials
- PVC pipes and fittings in 1- to 2-inch diameters.
- Diverter valve for switching flow directions.
- Mesh or sediment filter to capture particulates.
- Submersible pump if gravity flow proves insufficient.
- Optional storage tank holding 50 to 200 gallons.
- Drip irrigation lines or hose adapters for distribution.
- Pipe cement, Teflon tape, and sealants.
- Protective equipment including gloves, goggles, and a dust mask.
Time and Skill Level
- Duration: 1 to 3 days for laundry-based systems; extend for broader applications.
- Complexity: Moderate for simple reroutes; advanced for multi-fixture connections.
Detailed Installation Steps
-
Assess and Plan the Layout. Survey the path from source fixtures to irrigation zones, verifying adequate slope for natural drainage—aim for at least 2 percent grade.
-
Secure the Water Supply. Isolate the main valve and disconnect power to nearby appliances to prevent accidents during work.
-
Fit the Diverter Valve. Attach it securely to the selected drain line, such as from a washing machine, enabling manual or automatic flow diversion.
-
Incorporate Filtration. Position a robust filter immediately after the diverter to remove lint, hair, and sediments, selecting one with 100-micron or finer screening.
-
Route the Piping. Bury PVC lines 6 to 12 inches underground, avoiding sharp bends that could impede flow, and protect against root intrusion with sleeves.
-
Set Up Distribution. Connect to subsurface drip tubing or soaker hoses, ensuring even coverage without surface runoff or erosion.
-
Conduct Testing. Activate a full wash or shower cycle, inspecting all joints for leaks and verifying unobstructed flow to endpoints.
-
Apply Labels and Records. Tag all components clearly—use weatherproof markers—and maintain a log of materials and modifications for regulatory review.
-
Restore the Site. Refill trenches with soil, layering in amendments if planting over the area, and tamp down to prevent settling.
-
Obtain Final Approval. Arrange for a professional inspection to confirm adherence to codes before operational use.
Expert Advice: Position filters accessibly near entry points; routine cleaning every two weeks prevents buildup and maintains efficiency.
DIY Feasibility Versus Professional Installation
Certain projects suit hands-on homeowners with plumbing experience.
Suitable for DIY Efforts
- Above-ground laundry diversions to nearby planters.
- Straightforward single-line reroutes in accessible spaces.
- Gravity-based distributions without mechanical aids.
Scenarios Requiring Experts
- Integrations involving showers or baths due to higher contaminant loads.
- Pumped or tanked systems for elevation challenges.
- Routes through finished walls, slabs, or foundations.
- Jurisdictions mandating certified plans or anti-backflow devices.
Professionals bring specialized knowledge in hydraulic calculations, pathogen control, and permit navigation. They submit detailed schematics, coordinate inspections, and mitigate liability from code violations or water quality issues.
Ongoing Maintenance for Long-Term Performance
Reliable operation hinges on consistent upkeep to avert failures.
Scheduled Maintenance Routine
- Monthly Checks: Disassemble and rinse filters; lubricate diverter valves.
- Quarterly Inspections: Clear lines with a mild vinegar flush; scan for unusual scents or blockages.
- Annual Overhauls: Measure system throughput; replace degraded seals or pumps as needed.
Desired System Indicators
Expect consistent, odor-free distribution with vibrant plant response and minimal soil salinization. Address any drainage delays or foul smells promptly by isolating and servicing affected segments.
Proactive Strategies
- Select plant-friendly, phosphate-free detergents to nurture soil biology.
- Eliminate harsh chemicals like bleach that disrupt beneficial bacteria.
- Direct greywater via buried lines to inhibit evaporation and pathogen spread.
- Educate residents on avoiding grease, solids, or toxics in contributing drains.
Complementary Water-Saving Alternatives
Greywater pairs effectively with other conservation methods.
Rainwater Collection Systems
Ideal for rainy climates, these capture rooftop water in cisterns for garden use. Setup costs span $500 to $5,000 based on capacity, with simpler filtration than greywater. Reliability ties to precipitation, so integrate sensors for optimal timing.
Efficient Plumbing Fixtures
Upgrade to low-flow models: aerated faucets, dual-flush toilets, and water-saving showerheads slash indoor use by 20 to 30 percent. Total home retrofits run $100 to $600, install quickly without permits, and yield instant bill relief.
Automated Irrigation Technology
Weather-responsive controllers monitor evapotranspiration and adjust schedules dynamically. Priced at $150 to $400, they trim outdoor consumption by 10 to 20 percent. Combine with greywater for synergistic efficiency gains.
Pre-Installation Preparation Checklist
- Verify local ordinances and secure necessary permits.
- Pinpoint eligible fixtures for greywater diversion.
- Evaluate terrain slopes and map distribution paths.
- Source components matched to expected daily volumes.
- Allocate funds covering materials, tools, and professional fees.
- Stock eco-compatible cleaning products.
- Prepare labeling supplies and a dedicated maintenance journal.
Implementing Greywater for Sustainable Results
Begin with a targeted laundry diversion to build confidence and minimize disruption. Monitor performance through the first season, tracking bill reductions and plant health. Expansion to additional sources follows once basics prove reliable.
Organize all documentation—from permits to service records—for seamless inspections and resale value. A thriving, low-water yard signals success, while contributing to broader water security. Thoughtful execution transforms routine wastewater into a valuable asset for your landscape.