The Real Cost of Flood-Proofing Floors in 2026
Quick Take
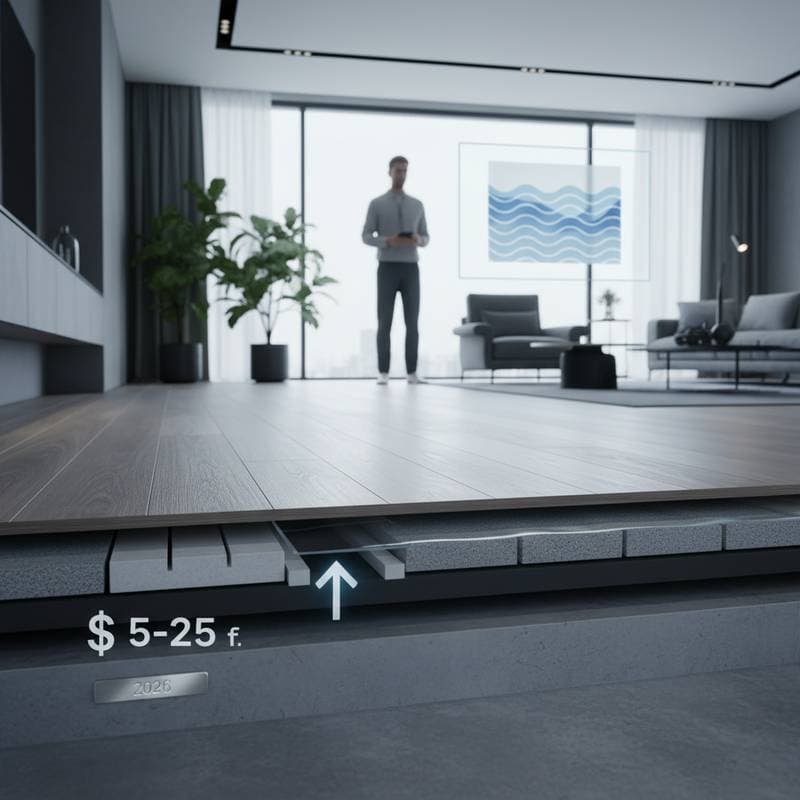
Flood-proof flooring protects homes from water damage, though it requires a higher initial investment.
- Budget $5 to $25 per square foot, based on material choices and installation labor.
- Opt for materials such as vinyl, tile, or concrete, which offer strong resistance to water.
- Professional installation guarantees proper sealing and adherence to building codes.
What It Is
Flood-proof flooring consists of surfaces designed to withstand standing water without swelling, warping, or developing mold. These options incorporate non-porous materials, sealed joints, and waterproof adhesives to minimize damage from moisture intrusion. The primary aim extends beyond mere survival of floods; it facilitates quicker cleanup and reduces the likelihood of frequent replacements.
Pros and Cons
Pros
- Resists moisture and prevents mold growth.
- Lowers expenses associated with post-flood cleanup.
- Prolongs the durability of floors in humid environments.
- Enhances property value in areas susceptible to flooding.
Cons
- Involves greater initial expenses compared to traditional flooring.
- Certain materials may feel cold or rigid underfoot.
- Offers fewer aesthetic choices than wood or carpet.
- Might require subfloor repairs following extreme flood events.
When to Use It or When It Fails
Use flood-proof flooring when:
- Residing in a floodplain or coastal region.
- The basement or ground level experiences recurrent leaks.
- Seeking a low-maintenance option for areas like laundry or utility rooms.
It can fail when:
- Placed over damp or unsealed subfloors.
- Water infiltrates through walls rather than solely the floor.
- Seams and joints lack complete sealing.
Step-by-Step: Flood-Proofing a Floor
Tools and Materials
- Utility knife
- Notched trowel
- Waterproof adhesive
- Floor roller
- Silicone sealant
- Moisture barrier underlayment
- Personal protective equipment: gloves, knee pads, respirator for epoxy applications
Time: 1 to 3 days, varying by room size
Difficulty: Moderate to advanced
1. Prep the Area
Remove the existing flooring and examine the subfloor thoroughly. Ensure it remains dry, structurally sound, and level. Employ a moisture meter to verify subfloor humidity levels below 12 percent.
2. Seal the Subfloor
Apply a waterproofing membrane or liquid sealant to block moisture migration. Allow full drying before proceeding to subsequent steps.
3. Install the Moisture Barrier
Position a polyethylene sheet or waterproof underlayment, overlapping seams by at least 6 inches and securing with tape.
4. Cut and Dry-Fit Flooring
Measure and cut planks or tiles precisely. Maintain a 1/4-inch expansion gap along walls. Arrange the full layout without adhesive to confirm fit.
5. Apply Adhesive
Distribute waterproof adhesive using a notched trowel. Proceed in manageable sections to maintain adhesive workability.
6. Lay Flooring
Secure each piece firmly into the adhesive. Utilize a floor roller to eliminate air pockets and achieve complete adhesion.
7. Seal Joints
Apply silicone or urethane sealant along all seams and wall perimeters. Smooth the sealant with a gloved finger for uniform coverage.
8. Inspect
Examine for bubbles, irregular seams, or overlooked areas. Reapply the roller as necessary. Remove any adhesive residue prior to curing.
9. Clean Up
Dispose of removed flooring and adhesive containers according to local regulations. Cured adhesive and vinyl remnants typically qualify as construction waste.
Pro Tip: For floors adjacent to drains or sump pits, incorporate a slight slope to channel water away from walls.
Costs
Typical range: $5 to $25 per square foot, encompassing labor.
Factors that raise cost
- Custom patterns or surface textures.
- Necessary subfloor repairs or replacements.
- Premium options like epoxy or porcelain tile.
- Regional labor availability or additional humidity mitigation.
Factors that lower cost
- Selection of sheet vinyl over tile or epoxy.
- Installation atop concrete rather than wood subfloors.
- Completion of preparatory tasks independently.
When replacement beats repair
If floodwater persists beyond 24 hours or causes delamination, opt for complete replacement. Hidden mold can compromise adhesives beneath seemingly waterproof layers.
DIY vs Pro
Safe for DIY if:
- Capable of flooring removal and reinstallation without impacting structural elements or electrical systems.
- Familiar with moisture assessment and sealing techniques.
- Project scope remains under 300 square feet.
Hire a pro when:
- Subfloor requires leveling or crack remediation.
- Involves epoxy applications or integrated drainage features.
- Building codes mandate inspections for vapor barriers or sump setups.
What the pro does differently
Contractors employ advanced tools like calcium chloride kits for moisture testing, select humidity-compatible adhesives, and ensure even sealant distribution. They also navigate local regulations for flood-resistant builds, potentially influencing insurance terms.
Common Flood-Proof Flooring Materials
Vinyl Plank or Sheet
Cost: $5 to $12 per square foot installed.
Why it works: Provides a non-porous surface with secure seams.
Downside: Prone to curling if seams separate or subfloors shift.
Ceramic or Porcelain Tile
Cost: $9 to $18 per square foot installed.
Why it works: Remains impervious to water with proper grouting and sealing.
Downside: Presents a cold, potentially slippery surface when wet.
Concrete
Cost: $6 to $15 per square foot installed.
Why it works: Delivers exceptional durability and straightforward sanitization.
Downside: Susceptible to cracking without adequate sealing or reinforcement.
Epoxy Coating
Cost: $8 to $20 per square foot installed.
Why it works: Forms a seamless, bonded barrier on concrete substrates.
Downside: Requires meticulous preparation and ample ventilation during curing.
Rubber Flooring
Cost: $10 to $25 per square foot installed.
Why it works: Offers flexibility against impacts and water exposure.
Downside: Features restricted color palettes and emits odors while curing.
Maintenance or Prevention
Frequency: Conduct inspections seasonally or following substantial rainfall.
Tasks
- Examine seams and baseboards for lifts or fissures.
- Clean using mild detergent, preventing water accumulation.
- Reapply sealant to grout or epoxy at intervals of several years.
- Operate a dehumidifier during periods of high humidity.
Outcome: Maintains floor integrity, eliminates odors, and ensures safety in moist settings.
Alternatives
Option A: Raised Flooring Systems
Suitable for frequently flooding basements. Employs plastic or metal grids beneath removable tiles to permit water drainage. Ranges from $10 to $22 per square foot. Provides elevation and airflow, though it may diminish headroom.
Option B: Pressure-Treated Subfloor with Vinyl Top
Ideal for versatile spaces. The rot-resistant wood foundation pairs with a moisture-repelling vinyl layer. Costs $8 to $14 per square foot. Offers moderate durability with improved comfort compared to solid concrete.
Option C: Polished Concrete with Sealer
Appropriate for garages or workshops. Reflects light, repels oils and water, and endures for decades. Costs $5 to $11 per square foot. Demands regular resealing to preserve appearance.
FAQs
Can I just waterproof my existing floor?
Only if the underlying material tolerates moisture. Hardwood and laminate prove unsuitable. Tile and concrete benefit from sealing, yet seams and transitions require careful treatment.
Do I need a moisture barrier under vinyl on concrete?
Yes. Sealed concrete still emits vapor. Polyethylene or foam underlayment safeguards adhesives against bubbling.
Will flood-proof flooring stop water from entering my home?
No. It mitigates damage upon water entry. Complement with exterior drainage, sump pumps, and appropriate site grading.
What happens if mold appears under the floor?
Remove the flooring, thoroughly dry the subfloor, and apply a fungicidal treatment. Replace any saturated insulation or padding.
Can insurance cover flood-proof flooring upgrades?
Standard policies rarely do, but flood insurance might lower premiums for compliant installations. Consult an agent prior to commencement.
Which material dries fastest after flooding?
Tile and concrete recover most rapidly. Vinyl follows closely if seams remain intact. Avoid carpet and wood in vulnerable locations.
Do I need to remove baseboards during installation?
Yes. Removal enables precise edge sealing. Reattach following sealant application and drying.
What if my floor slopes toward a wall?
Engage a professional to level with self-leveling compound. Water pooling at walls heightens structural risks.
Checklist: Flood-Proof Floor Readiness
- Confirm flood zone status and associated risks.
- Inspect subfloor for cracks and excess moisture.
- Select non-porous materials certified for flood resistance.
- Incorporate a vapor barrier prior to flooring placement.
- Seal all seams, joints, and wall edges with waterproof caulk.
- Perform annual maintenance on sealants and grout.
- Retain documentation for insurance or property sales.
Budget Check
Upfront cost: A standard room installation begins around $2,500. Expansive basements or luxury materials may exceed $10,000.
Lifespan: Typically endures 15 to 30 years with proper maintenance.
Maintenance cost: $50 to $150 annually for resealing, cleaning supplies, and small fixes.
Resale impact: Flood-resistant features appeal to buyers in vulnerable areas, highlighting proactive upkeep and reduced risks.
Fit Check
Space: Suited to concrete slabs, basements, and ground-level rooms.
Climate: Essential in humid or storm-frequent locales.
Systems: Integrate with sump pumps, vapor barriers, and drainage for comprehensive defense.
Lifestyle: Accommodates families, pets, and demands for simple spill recovery.
Condition Check
Works well when:
- Seams maintain tightness and sealing.
- Subfloor stays dry.
- Drainage and sump mechanisms operate effectively.
Fails when:
- Adhesives degrade from extended exposure.
- Mold develops beneath coverings.
- Hydrostatic forces dislodge the flooring.
Address soft areas, musty odors, or raised edges promptly to avert extensive replacements.
Pro Tips for Success
- Test moisture levels twice: before sealing and post-curing.
- Select color-matched sealant to conceal joints while protecting edges.
- Incorporate anti-slip additives into epoxy or sealers for enhanced traction.
- Store spare materials in a labeled container for swift repairs.
- Review warranty terms; certain manufacturers invalidate coverage without specified adhesives.
Making It Happen
Flood-proof flooring represents a prudent investment for water-vulnerable properties. Although the initial outlay proves substantial, it averts thousands in potential flood-related repairs. Prioritize thorough preparation, meticulous sealing, and consistent checks. Align material selection with space usage and moisture frequency.
Confident tool handling and preparation patience suit small-scale DIY efforts. Larger areas or sophisticated finishes benefit from professional expertise. Upon completion, the secured floor delivers reassurance amid rainy forecasts.


